What is Beer Run?
One pub. One game. Don't get nicked.
Beer Run is a live Twitch chat RPG built around the local pub's "informal economy." You're a chancer — grafting between jobs, pulling heists with the crew, and trying not to end up face-down in a police van.
The whole game runs on a single rhythm: Graft between jobs with BeerQuest, pull Jobs solo or as a crew, and deal with Trouble when it shows up — foes, zone heavies, and the occasional shared street boss that half the chat piles into.
One character. One level. One heat meter. Everything feeds into the same pub-crime story.
At a glance
The Rhythm — Graft / Jobs / Trouble
How the whole game fits together
Every session follows the same loose pub-crime loop. You don't have to play all three modes but they all feed into each other — XP, heat, rep, and kit flow between them.
!bq pub explore to start. Runs on its own cooldown between jobs — something to do while you wait for the next round.!beerrun, crew rounds with !join. Your gear loadout matters here — weapons, utility, and shop consumables. Completing jobs earns XP, cash, and raises rep.!attack !heal !takecover !rush. BeerQuest zones use !bq attack/takecover/parry/rush/flee. Heavies and street bosses show up too — the whole chat can pile into street bosses.Sheet & Kit Commands
How to check your character, gear, and bag
!char!kit!bag!use <item>!bq!beerquest — status, explore, rest, fight, equip, train. All the same.!reviveOld commands still work — !beerstats, !beerquest train, etc. are permanent aliases. Nothing got deleted.
Joining a Run
Get in before the round closes
!beerrun!beerrun [item]!beerrun [item] [item]You can only join once per round. The round closes before results resolve — latecomers miss out. Your job is drawn randomly from the 65-role pool each round.
Items & Loadout
What you bring in determines what you walk out with
Combat stats
| Stat | What feeds it | Who carries it |
|---|---|---|
| ⚔️ Attack | Success, payout, crate, and risk stats on a weapon all push its fight damage up. | Weapons only; any useful weapon has at least 1 Attack |
| 🛡 Defence | Arrest safety, injury safety, crate, and payout stats on protective kit feed damage reduction. | Utility & insurance kit; pure offence pieces usually have none |
Consumables
Crew InsuranceDodgy Health PackThe Shop
Build your loadout between rounds
The shop refreshes each round with 4 items drawn from the full 361-item pool. There is a 25% chance per round that a fifth bonus slot appears — this always stocks a consumable (Crew Insurance or Dodgy Health Pack).
The shelf is archetype-aware: each slot prefers a role not already present, so you'll typically see a spread of Striker / Earner / Hauler / Minder rather than four of the same thing. Each item shows a role badge so you can read the shelf at a glance.
You can hold items across rounds — you don't have to equip everything you own. Build a loadout you're happy with, then run it until an upgrade appears. Use !upgrade <item> to rank a favourite piece up instead of waiting for a replacement.
BeerQuest RPG
The continuous game running between jobs
BeerQuest is the always-on RPG layer. While you're waiting for the next heist round, you're out grafting — exploring zones, scrapping with foes, resting off fatigue, and levelling up your crew stats. Type !bq status to see where you're at.
Crew stats
Checks are d20 + relevant stat. Brains nudges all rolls, so a bit of Brains investment goes a long way even if you're specialised elsewhere.
Zones — unlock by level
Each zone runs its own independent cooldown clock — you can rotate zones to keep exploring while others reset. Rest cooldown is a flat 60s.
BeerQuest commands
!bq <zone> explorepub (75s), alley (100s), cellar (150s), snug (180s), rooftops (240s). Each zone has its own clock.!bq rest!bq train <stat>!bq attack / takecover / parry / rush / flee!bq laylow!bq lay.!bq status!bq bag!use <item>.BeerQuest consumables
ShandyBlackcurrant CordialStale Scotch EggCheese & Onion CobHealing PintStout FloatChips & GravyMicrowave Pub CurryGuest AleSteak & Ale PieHair of the DogPork ScratchingsPep TalkKebab VoucherLast Orders BellLucky BeermatPub Quiz AnswersSuspicious White PowderPure Suspicious White PowderSoggy Paper StrawgRape JuiceBag of IcePickled EggRound for the BarBronze Scratch CardScratch CardSilver Scratch CardGold Scratch CardLandlord Lottery TicketFull EnglishLoopy JuiceBrown EnvelopeMystery KegCheeky ChaserGaffer Tape & PlastersA Round for the BarDaily contracts & streak
Each day you get 3 contracts drawn from the pool — complete all 3 for a 50c bonus payout. Completing them on consecutive days builds a streak multiplier on the all-done bonus: +10% per day, capping at 2×. Miss a day and the streak resets.
Sample contracts: do 3 explores, work the pub 3 times, raid the cellar twice, show your face in the snug, run the rooftops once, win 2 scraps, pull off 2 jobs, take down a heavy.
Coin flip vs the landlord — !brflip
Stake 5–300c on a coin flip: double or nothing, 49% win, 60s cooldown. The landlord keeps a sliver. Pure gambling — don't stake what you can't lose.
Questlines
Fourteen chapters that tell your pub-crime story
Questlines are auto-assigned story chains — 14 chapters in all, running from your first pint to Level 20+. Complete one and the next kicks off automatically. Each stage has a goal — explore a zone, win a fight, find an item — and pays out XP, cash, or gear. Finish a full chapter and you earn a permanent honorific title. Type !story to see where you are.
Progress ticks in chat, on the web app, and via the extension — any surface, same progress. The opening arc:
Then it keeps going. Chapters 6–14 take you through the Snug Society and over the rooftops into the late game (Lv 16–20): The Snug Society (Made Member), Over the Rooftops (Skyline Ghost), Pillar of the Community, The Lock-In (Lock-In Legend), Brand Ambassador, Midnight Logistics (Fence's Friend), The Connoisseur, Turf Accountant, and Last Orders (Stuff of Legend). Every chapter mints its own title — and you need all 14 complete before you can prestige.
Questpack & Trinkets
Three passive slots for BeerQuest buffs
Your questpack holds up to 3 trinkets (a 4th slot unlocks at Level 20) — passive items that buff your BeerQuest performance. Equip them with !bq equip <trinket>, remove them with !bq unequip <trinket>. Buffs stack — multiples of the same type multiply or add depending on the buff.
Your heist gear also feeds BeerQuest: weapon attack → +hit damage, utility/insurance defence → +block, haul/crate items → +loot odds. So keeping your kit well-equipped matters even when you're just grafting.
The web Equipped panel shows all 4 tiles at all times — the 4th shows a lock icon and “Unlocks Lv20” until you reach the threshold.
Trinkets
You have 3 slots until Level 20, then 4. Strong explore combo: Landlord’s Watch + Hip Flask + Pickled Egg Jar (or Dodgy Sat-Nav for speed at a heat cost). Combat bruiser: Pool Cue + Keg Belly + Beer Jacket + Foam Scraper at L20. Economy: The Slate + Brewery Map + Crooked Darts.
The Heavies
Zone mini-bosses drawn out by heat
Every explore has a chance of drawing a heavy — a zone mini-boss who ambushes you mid-explore. They're tougher than regular foes, hit harder, and always drop an item win or lose. Well, you need to win to get the drop. Obviously.
Heat is what draws them. Higher heat = more likely to get jumped. Keep heat low by resting, and the heavies leave you alone. Let it stack and Big Ronnie starts turning up every other alley trip.
Ambush odds
| Condition | Effect |
|---|---|
| Base ambush chance | 2% + 1.5% per heat point (cap 20%) |
| Level gate | BeerQuest Lv 3+ only — rookies are safe |
| Cooldown | 10-minute per-player cooldown between heavy ambushes |
| Win reward | Big cash + XP + rep + guaranteed item drop — and burns −3 to −5 heat off |
The five heavies
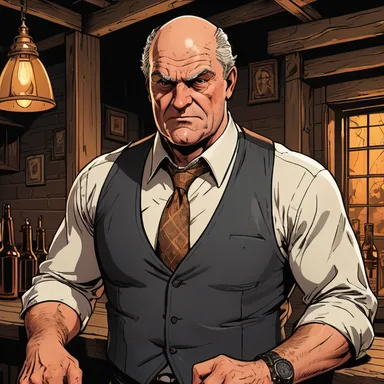 Pub heavy
 Alley heavy
 Cellar heavy
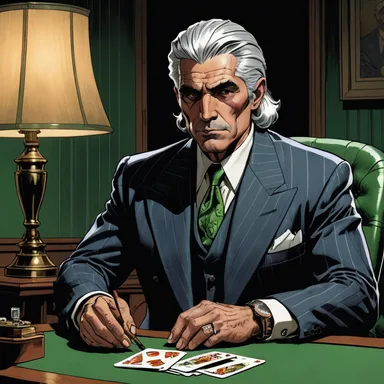 Snug heavy
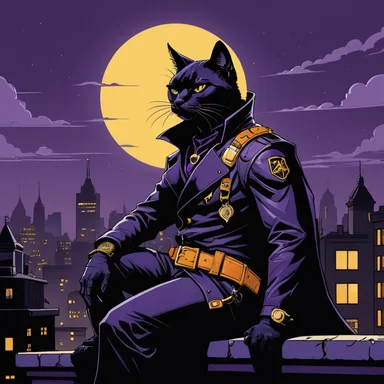 Rooftops heavy
Heavies use the full BeerQuest fight system — attack / take cover / parry / rush / flee. Below ~55% HP they enrage and start winding up big hits. The game warns you with a "tell" — Take Cover or Parry that swing or you eat the full thing.
Street Bosses
Shared heist bosses — the whole chat jumps in
Sometimes a BeerQuest explore goes sideways in a much bigger way. A street boss spawns — a full shared heist-level encounter that anyone in chat can join. These are the same bosses from the main heist encounters (Cuff Squad, Pubwatch Response Unit, etc.) running with all the usual machinery: phases, sweeps, overlay cards, the works.
The difference is the scale. Street bosses spawn from the continuous game and the whole community takes them on together — not just whoever joined the round.
| Detail | Value |
|---|---|
| Spawn source | BeerQuest explore roll — chance rises with more active explorers |
| HP scaling | Scales with recently-active explorers in the session |
| Global cooldown | ~30 minutes between street boss spawns |
| Auto-join (chat) | Your first !attack, !rush, !heal, or !takecover adds you to the party automatically |
| Auto-join (web) | "Join the fight" button appears on the spectator row |
| Rewards | All joiners share victory rewards — you don't need to be the one who triggered it |
When the overlay announces a street boss — just start attacking. Your first command auto-joins you to the party. No need to find a special join command.
Live Events
78 events that shift the odds every round
Every round draws one event from the 78-event pool. Events affect the whole crew — they're not targeted at individuals. The event resolves before the run outcome is calculated.
Event categories
Sting operations are high-risk, high-reward. A well-stacked Defence loadout can absorb enough of the arrest penalty to make them profitable. Running bare is gambling.
Boss Encounters
A standoff between your crew and whoever showed up
Some runs end in a boss encounter — a real-time fight in chat. The entire crew competes together against a single boss, played out live on the stream overlay.
Trigger conditions
| Situation | Encounter opens? |
|---|---|
| Run ended in an arrest | Always |
| Run failed, no arrest | 75% chance |
| Scheduled boss heist | Boss already armed |
The boss roster — all 21
HP scaling
Boss HP = 240 base + 95 per runner. A solo fight is ~335 HP. Bigger crews mean a tankier boss but far more firepower — coordinate.
Combat
What to type during a boss fight — try it live below
Demo numbers are illustrative — demo uses the same verb/tell logic as the real game.
The five combat verbs
| Command | Check | What it does |
|---|---|---|
!bq attack | Muscle vs DC 10 | Standard swing. Hits for base damage; crit on a strong roll. Safe, reliable. |
!bq rush | Muscle vs DC 12 | All-out swing — 1.5× damage (2.2× on a crit), hits the opening for 1.6×. Your guard is down: incoming damage ×1.4 this round. High risk, high return. |
!bq takecover | — | Forgo your attack and dive behind cover — block 60–85% of the hit (scales with Muscle). On a boss wind-up: 80–92% block and leaves them wide open. |
!bq parry | Brains vs DC 11 (+2 per parry in a row) | Only pays when there's something to read. On a wind-up tell or a lunge: block everything, counter, and leave them wide open. Against a normal jab it's just a half-guard (50% block, no counter). Fail: eat the full hit unblocked. Foes adapt — parry twice in a row and they've got your number (harder check, no lunges to punish). Mix it up. |
!bq flee | Wheels vs DC 11 | Try to break off. Success escapes cleanly (a Last Orders Bell skips the check). Fail: stuck in the fight. |
Combat modifiers
| Variable | Effect |
|---|---|
| Player miss / crit | Standard attack can miss (0 damage) or crit (×1.6). Crit requires a natural 18+ on the d20; a nat 20 always crits a non-fail. Rush crits deal ×2.2. |
| Boss crit chance | Boss hits crew for extra damage — prime time for a Guard wave |
| Encounter expiry | 6-minute timer — resets on every valid action. Keep someone attacking. |
| Opening bonus | After a Guard or Parry on the tell, next attack/rush deals ×1.6. Use it. |
Your item's ⚔️ Attack stat feeds directly into BeerQuest hit damage. A high-attack loadout is worth equipping even if your run normally focuses on Defence. The Pool Cue trinket adds flat damage on top.
Item Wear & Repair
Kit degrades on the job — keep it maintained or lose half its value
Every piece of equipped job gear has a condition starting at 100%. Each completed job costs 1 condition point. A failed job costs 2. Gear never breaks entirely — but once it drops below 30% it's classed as WORN and only contributes half its stat bonuses until repaired.
Worn kit shows up with a warning in !stash and !loadout, and on the web loadout panel with a Repair button. The stat halving applies silently — it's on you to stay on top of it.
Repair commands
!repair!repair all!repair <item>Repair cost formula
Cost per condition point = item cost ÷ 200 (minimum 1c per point). A piece that cost 200c and dropped from 100% to 30% has 70 missing points — repair costs 70c. Cheap kit is cheap to fix; premium gear costs more to maintain.
Worn kit on an expensive item silently tanks your success or defence bonuses by half. If a run feels like it's underperforming, check !repair first.
Shop Roles & Prestige
Kit archetypes, the polishing bench, and legend stars
Shop archetypes
Every piece of kit has a role — a label that tells you what it's actually for. The daily shop shelf deliberately stocks different roles so there's always a real choice to make, not just a numbers race.
The role badge shows on each item in the shop and in your loadout panel on the web app. The shelf rotates to keep at least one of each major role available each day.
Kit polishing — !upgrade
Spend cash to push item XP into a piece of owned kit. Each polish bumps its rank, which stacks small permanent bonuses on top of its base stats — more success, more reward, more crates depending on the item's role. Rank bonuses are doubled from the previous patch, so it's genuinely worth the investment now.
Crates — !crate <tier>
Burning a hole in your pocket? Crack a crate: a proper grab-bag: mostly gear (rarity-weighted over the whole shop), with cash pockets, banked crates, XP finds, and Beerquest bag items in the mix. 📦 Bronze 250c (cheap and cheerful), 🥈 Silver 700c (better odds), 🏆 Gold 2,000c (guaranteed rare or better). Already own the drop? It's fenced on the spot for 40% of its price. And every crate has a small chance of a straight cash stash instead.
World Events
Every so often the streets shift for everyone: an ⚡ XP Surge (+15% XP, 15 min), 🍀 Lucky Streets (+5% run success, 15 min), or a 📦 Crate Rush (+1 crate on winning runs, 10 min). Events announce themselves in chat when they hit — !market shows what's live and how long is left. Keep an eye out for stashed chests on your runs too; some doors just happen to be open.
Word on the street: a certain Inspector has been seen prowling the brewery district, clipboard out. His citations stick. Bring crew.
Prestige — !prestige
Hit Level 50 and complete all 14 chapter questlines and you can sell up — resetting level, stats, and bag, but you walk away with a quarter of your cash plus all your titles, kit, and crew. Each prestige mints a legend star. It’s meant to be a grind — selling up is the endgame flex.
The Legend Board: every star is a choice. Spend it on one of six permanent perks — browse with !prestige board, spend with !prestige pick <perk> (or use the board in the web app's character panel).
| Perk | Per pick | Cap |
|---|---|---|
| 🎯 Old Hand | +2% run success | 5 picks |
| 📈 Fast Learner | +10% XP earned | 5 picks |
| 💪 Iron Liver | +7% max HP | 5 picks |
| 🎒 Deep Pockets | +15 bag capacity | 5 picks |
| ⏱️ Quick Turnaround | −4% run cooldown | 5 picks |
| 📦 Crate Eye | +10% bonus-crate chance | 5 picks |
Picks are permanent and survive future sell-ups. Build tall (max one perk) or wide (spread the stars) — a speedrunner's board looks nothing like a hoarder's.
Titles — !titles / !title <name>
Titles are bragging rights you wear on your character — pick one with !title <name|number> or the dropdown on the web app's Character panel. They come from four places:
Chapters — every completed questline awards its title (Cellar Boss, Skyline Ghost, Lock-In Legend…). The brand shelf — collection milestones at 25/50/100/all 154. Your record — 21 stat milestones earned automatically, including Barrel Chested (100 runs), Sticky Floor Veteran (250), Forklift Certified (500 crates), Jammy Beggar (10 streak), The Brink's Mat Of Beer (2,000c haul), Pub Enemy No. 1 (25 arrests), Minted (10,000c), and Pillar Of The Community (Allegedly) (L50). Legend stars — Local Legend (★1), Pub Royalty (★3), Five Star Establishment (★5).
Loot & Rewards
What drops when the boss goes down
Your normal run rewards are separate from boss loot. You don't need to win the fight to get your cut — boss loot is a bonus on top of whatever you already earned from the run. When a boss fight resolves, the web app pops a full payout screen — recap, per-runner payouts, loot drops and level-ups.
Brands
154 targets in the pool
The brand being stolen is drawn fresh every round from 154 options. It flavours the narrative and sets the scene — it doesn't directly alter base odds, but the vibe matters.
The Brand Collection
Every clean run logs the brand you lifted onto your personal shelf. Each find has a 3% chance of being a ✨ vintage. Browse your shelf on the web app's Brands stash tab or with !collection.
Milestones earn titles: 25 — Shelf Starter, 50 — Brand Botherer, 100 — Century Club, and all 154 — The Full Cellar.
Some brands appear as slot variants (same brand, different pack size). These are intentional — counted as known duplicates in the system, not errors.
The Beer Black Market
Crates are a commodity — the fence's price drifts
Every crate you haul on a run gets banked automatically. The fence pays a price that drifts between 1–6c per crate, ticking every 10 minutes — and occasionally SURGES to 9c for about 8 minutes (announced in chat — that's your moment to sell the lot).
Check the going rate with !market and cash out with !fence all. The web app's Shop tab shows the live price, a trend sparkline, and a one-tap fence button.
Patience pays: crates banked at 1c are worth 9× that in a surge. There's also sometimes a live bonus on top while the stream is up — watch for the announcement.
Beer Brawls
Settle it in the car park — chat bets on the outcome
Call someone out with !beerbrawl <name> [stake] (short: !bb). They get 60s to !bb accept or decline. Both fighters put up the same stake (10–5,000c, escrowed) — winner takes the pot. Declining costs nothing.
On accept there's a 45-second betting window, then the fight goes live on an arcade-style VS card on the web app — fighters left and right with HP bars and gear, the blow-by-blow log underneath.
The fight
Fighters use the BeerQuest verbs — attack / take cover / parry / rush — via !bb <verb> or the web buttons. Every verb runs the same per-verb cooldown for both fighters (attack 5s, take cover 6s, parry 8s, rush 10s) — so it's about reading your opponent, not typing speed. Macros win nothing here.
Your HP pool, attack and defence come from your crew stats and equipped gear — duels never injure your real character. Cash only. First to drop wins; if the 3-minute bell rings, it goes to points (highest remaining HP%). Dead-even = a draw, everyone refunded.
Backing a fighter — !back <name> <amount>
During the 45s window anyone (except the fighters) can bet 5–5,000c, one bet each. It's a parimutuel pool: winners get their stake back plus a share of the losers' pool, split pro-rata by bet size. The house skims 5% of the losing pool for the pub fund. Back the winner alone and you take the whole losing pool.
Safety rails: both fighters need L3+, same pair can't rematch for 15 minutes, one brawl at a time, and the loser keeps all their gear — only the stake is on the line.
Jobs
64 roles, randomly assigned each run
When you join a run you're assigned a random job from 65 possible roles. Your job gives you a narrative title and may adjust your base stats for that round — it rerolls every run, so you can't lock a specific one.
Classes
Pick a playstyle — small but real modifiers that compound across the game
Every runner can pick one of six classes with !class <id> or the dropdown in the web app. First pick is always free. Changing later costs 300c and has a 10-minute cooldown.
Classes give flavour-level modifiers — none is mandatory for anything, but each feeds a distinct playstyle. Type !class with no argument to list them all in chat.

!class shotter
Glass-half-full mentality: when you connect, you really connect.

!class chugger
Built like a keg — thick, heavy, and hard to put down.

!class wobbler
Nobody can hit what they can't track. 8% chance hits pass straight through you.

!class flex
The run pays better when you're the one who walked it.

!class gaffer
Runs the crew properly — heals harder, cover goes further, rep comes faster.
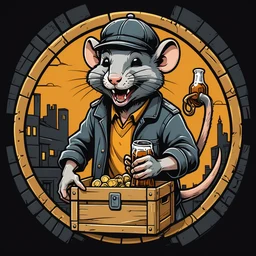
!class ratter
Always knows a bloke. Fence pays more, runs pull more crates, swings a bit softer.
Class modifiers apply everywhere that stat matters — encounter fights, BQ combat, brawls, solo runs, the fence. The class picker is also in the web app Character panel, below the title dropdown.
Chat Cheat Sheet
Everything you can type — the fast version
Chat commands are the casual layer. The full game — loadout, contracts, repair, prestige, crew — lives at djij.uk/beer-run/app.
Runs & heists
!beerrun!beerrun [items]!char!stash / !loadout!repair!repair all!upgrade <item>!prestige!prestige board!crate <tier>Boss encounters (heist)
!attack!heal!takecover!rush!revive!throw molotov / medkitBeerQuest (the continuous game)
!bq <zone> explore!bq rest!bq train <stat>!bq status!bq attack!bq rush!bq takecover!bq parry!bq flee!bq laylow!bq lay.!contracts!brflip <amount>!coinflip; !flip belongs to another bot) — 5–300c, 49% win, 60s cd.!bq use <item>!bq equip <trinket>!storyTitles, classes & the black market
!titles!title <name|number>!class!class <id>!collection!market!fence <n|all>!crew board / create / join / leave!wrapped!recap, or !wrapped @name to nose at someone else's.Beer Brawls (PvP)
!beerbrawl <name> [stake]!bb!bb accept / decline!bb attack / takecover / parry / rush!back <name> <amount>Tips & Strategy
How to stop being the one who gets nicked
!bq laylow pays 30c per heat point to clear the slate entirely.!repair and check the damage.